 So, over the years or months depending how frequently you play, you've probably chipped a bunch of paint off your racquet or maybe you just think your racquet has a crappy paint job. Well this post is for you!
We are going to go over how to repaint your racquetball racquet!
- Here is what you will need:
- 600 grit sandpaper
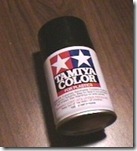
- Fast Drying Plastic Paint (We used Tamiya Color)
- A screwdriver to remove the grip
- A can of WD40 to help remove the grip
- An extra set of bumper guards and grommet strips
First of all, you will need to remove your strings, bumper guards and grommet strips unless of course you want to paint over them all.
Next, use your screw driver to pry your grip open a little bit and spray some WD40 inside. Repeat on both sides until it slides right off making sure you are careful not to ruin it so you can put the grip back on later.
The final step prior to painting is to go over the entire racquet with the 600 grit sandpaper and a bit of water. This is going to help the paint stick better.
Finally, secure your racquet and grab the Tamiya Color Plastic paint. Hold the can roughly 18 inches away from the racquet and try to spray evenly completely covering the entire racquet. Let the racquet dry for five minutes, find any missed spots, re-secure the racquet and do another coat over where necessary. Allow the racquet to dry for 15-20 minutes to ensure the paint has totally adhered to the surface.
Finally, reapply your grip, bumper guards, grommet strips and strings back onto your racquet and you are good to go!
No comments:
Post a Comment