Tuesday, July 22, 2008

The History Of Racquetball

So I haven't had a lot of time to play racquetball this summer; I've been too caught up playing hockey and seeing how fast I can climb the Grouse Grind.  Alas, I don't want people to think I've forgotten about racquetball, however this does seem to happen every year.  When it gets nice out, I tend to gravitate outdoors (aside from hockey).

Anyway, I thought maybe I'd give people a bit of a history lesson in racquetball today.  If you were unaware, racquetball was originally created by a man named Joe Sobek.  Sobek played tennis and handball but didn't think either one was fast enough paced; so what did he do? He created a sport which he called Paddle Rackets!

The name Paddle Rackets didn't last too long and before long it was renamed to what we now call it;racquetball

Racquetball grew very aggressively over the 1970s and 1980s but seemed to have hit a plateau in the 1990s, however the player base is still quite strong with over 5.5 million players world wide.

Unfortunately racquetball doesn't have a huge elaborate history like some other sports, but that is probably due to the fact the sport is only around 60 years old.  Maybe next century we will have a little more drama to back racquetball history up!

Check out The History Of Racquetball for a more detailed history of our beloved sport!
Thursday, June 19, 2008

Repainting Your Racquetball Racquet

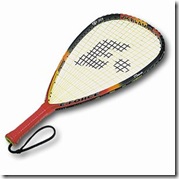
tamika1So, over the years or months depending how frequently you play, you've probably chipped a bunch of paint off your racquet or maybe you just think your racquet has a crappy paint job.  Well this post is for you!

We are going to go over how to repaint your racquetball racquet!

  • Here is what you will need:
  • 600 grit sandpaper
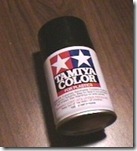
  • Fast Drying Plastic Paint (We used Tamiya Color)
  • A screwdriver to remove the grip
  • A can of WD40 to help remove the grip
  • An extra set of bumper guards and grommet strips

First of all, you will need to remove your strings, bumper guards and grommet strips unless of course you want to paint over them all.

Next, use your screw driver to pry your grip open a little bit and spray some WD40 inside. Repeat on both sides until it slides right off making sure you are careful not to ruin it so you can put the grip back on later.

The final step prior to painting is to go over the entire racquet with the 600 grit sandpaper and a bit of water.  This is going to help the paint stick better.

Finally, secure your racquet and grab the Tamiya Color Plastic paint.  Hold the can roughly 18 inches away from the racquet and try to spray evenly completely covering the entire racquet.  Let the racquet dry for five minutes, find any missed spots, re-secure the racquet and do another coat over where necessary.  Allow the racquet to dry for 15-20 minutes to ensure the paint has totally adhered to the surface.

Finally, reapply your grip, bumper guards, grommet strips and strings back onto your racquet and you are good to go!

Wednesday, June 18, 2008

Super Simple Backhand Tip

frisbee backhand I've been in Las Vegas for the last week, and was prepping a bunch of my work before I left, so I'm sorry for not posting much.  Since I'm still mega busy, I only have time to post a really simple backhand tip for those who may be struggling with getting their backhand shot up to par.

This tip is really simple and to the point, when trying to hit a racquetball with your backhand, imagine swinging the racquet as if you are throwing a frisbee.  The motion is nearly identical, and with enough practice, it will definitely improve your coordination when trying to smoke the ball!

If you need some more tips, here is an instructional video for your racquetball backhand.

Keep smacking those balls people!

Thursday, June 5, 2008

Simplicity: What Separates The Pros

When people start playing racquetball, they spend so much time trying to master all the most difficult moves.  Z serves, drive serves and other fancy shots that are higher risk than they are worth.

If you were to attend a racquetball tournament that had a spectrum of players from novice to pros, you will notice one major difference.  The novice players are all trying to hit impressive shots, they may score a few points with these special techniques, but they will most likely lose just as many points to messing up one of these high risk shots.

Now, if you take a walk over and watch a couple of professionals playing.  You are going to notice something, most of their serves are lob serves, and the majority of their shots are passes or pinch shots.  Pros stick to the basics because they know what works.  Stick to the basics and try to catch your opponent out of position.

In my opinion the three most important aspects of racquetball are being able to hit the ball with precision on both your forehand as well as your backhand, positioning, and consistency.

If you can master these three things, or at least maintain your focus on them, you will definitely become a better racquetball player.

Monday, May 19, 2008

What Is A Pinch Shot?

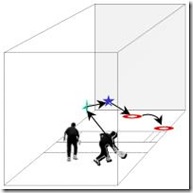
Racquetball Pinch Shot There are many different types of shots in racquetball, many of which I will cover over time when I'm less lazy, but the shot I am going to talk about today is called a pinch shot.

A pinch shot is typically used when you want to keep a low or soft hit in the front region of the court.

There are merely two varieties of pinch shots, off the left or right sidewall! Simple right?

The idea behind a pinch shot is to hit the ball off the side wall so the ball bounces off the side wall, hits the front wall, then bounces twice before it gets to the other side wall.  Pinch shots are great for when your opponent is deep in the court because when performed correctly your enemy will have very little time to get to the front of the court!

Next time you play racquetball give it a shot (pardon the pun), once you get this shot down, it will be a great tool in your racquetball arsenal.

Wednesday, May 14, 2008

The Ruling On Crotch Shots

racquetball crotch shotsI actually just learned this today and will definitely be applying this to my local racquetball matches.

If the ball contacts the floor and the front wall simultaneously (otherwise known as a crotch shot), the ball is considered out of play and the point or serve will go the player who did not hit the ball.

This goes for both regular rallies as well as on the serve return.  Here is the official ruling from the rule book in regards to crotch shots on a serve return:

Rule 3.10 OUT SERVES
Any of the following results in an out:
(g) Crotch Serve. Any served ball that hits the crotch of the front wall and floor, front wall and side wall, or front wall and ceiling is an out serve (because it did not hit the front wall first). A serve into the crotch of the back wall and floor is a good serve and in play. A served ball that hits the crotch of the side wall and floor beyond the short line is in play.


So next time you smack the ball into the crotch of the front wall and the floor, don't get so excited! You just lost the point!

Tuesday, May 13, 2008

Best Way To Apply Rubber Grip To Racket

racquetball-gripI've heard this come up a few times in the past when players decide its time to replace the rubber grip on their racket.  "What is the best way to stick the darned rubber grip to my racket?"

Much like there is more than one way to skin a cat, there is also more than one way to apply your grip to your racket.

The three techniques I've heard of all pretty much have the same process, the only major difference is the product you use as an adhesive.

The three products I know that DO work are the following:

  • Hair Spray
  • WD40
  • Lighter Fluid.

Ok, so you've got your chemical of choice and you are ready to get your grip on your stinking racket.  The first thing you are going to want to do is clean the handle of the racket to make sure no gunk is stuck on it.

Once clean, you are going to want to spray a little bit of your chemical (whichever you choose), onto a paper towel and rub it onto the handle making sure you don't use too much as it will take awhile to dry.

Next, apply some to the inside of the new rubber grip and push it onto the handle.  Again, make sure you only apply enough to make it slippery when putting it on.  If you over do it, you will be waiting forever for the thing to dry before you can use your racket.

Next, let your racket sit for 12 hours.  If you didn't use very much fluid, you may be able to use it earlier, but I would suggest waiting at least 12 hours to make sure that the grip has fully adhered to the racket!